
How to Download YouTube Subtitles as Text & Transcript Files
You may have considered subtitles to be an “extra” tech feature or something nice to have, but not necessary. While you can put out videos that don’t have subtitles, you will be limiting the reach your videos get and potentially miss out on having your message seen in places you want it to be visible. We’ll briefly cover how to download YouTube subtitles as text files, and why it’s important.
Subtitles are an easy and highly effective way to make your video content more accessible to a wider audience, especially with the tech tools we have at our disposal today. It’s no longer something out of reach for even those with limited time and budget.
There are many reasons someone would want to take the audio from a YouTube video and save it as a text file. It can help with offline viewing, studying, note-taking, and research. Here are the simple steps to do it:
Step 1: Go to Your Desired YouTube Video
If you’re not sure how to find it, there are a few places you can check. You may have it saved in your Library, especially if you’ve already seen it before. Check your History to see videos you’ve watched recently, or do a search for the terms that best describe it.
Subtitles are an easy and highly effective way to make your video content more accessible to a wider audience, especially with the tech tools we have at our disposal today. It’s no longer something out of reach for even those with limited time and budget.
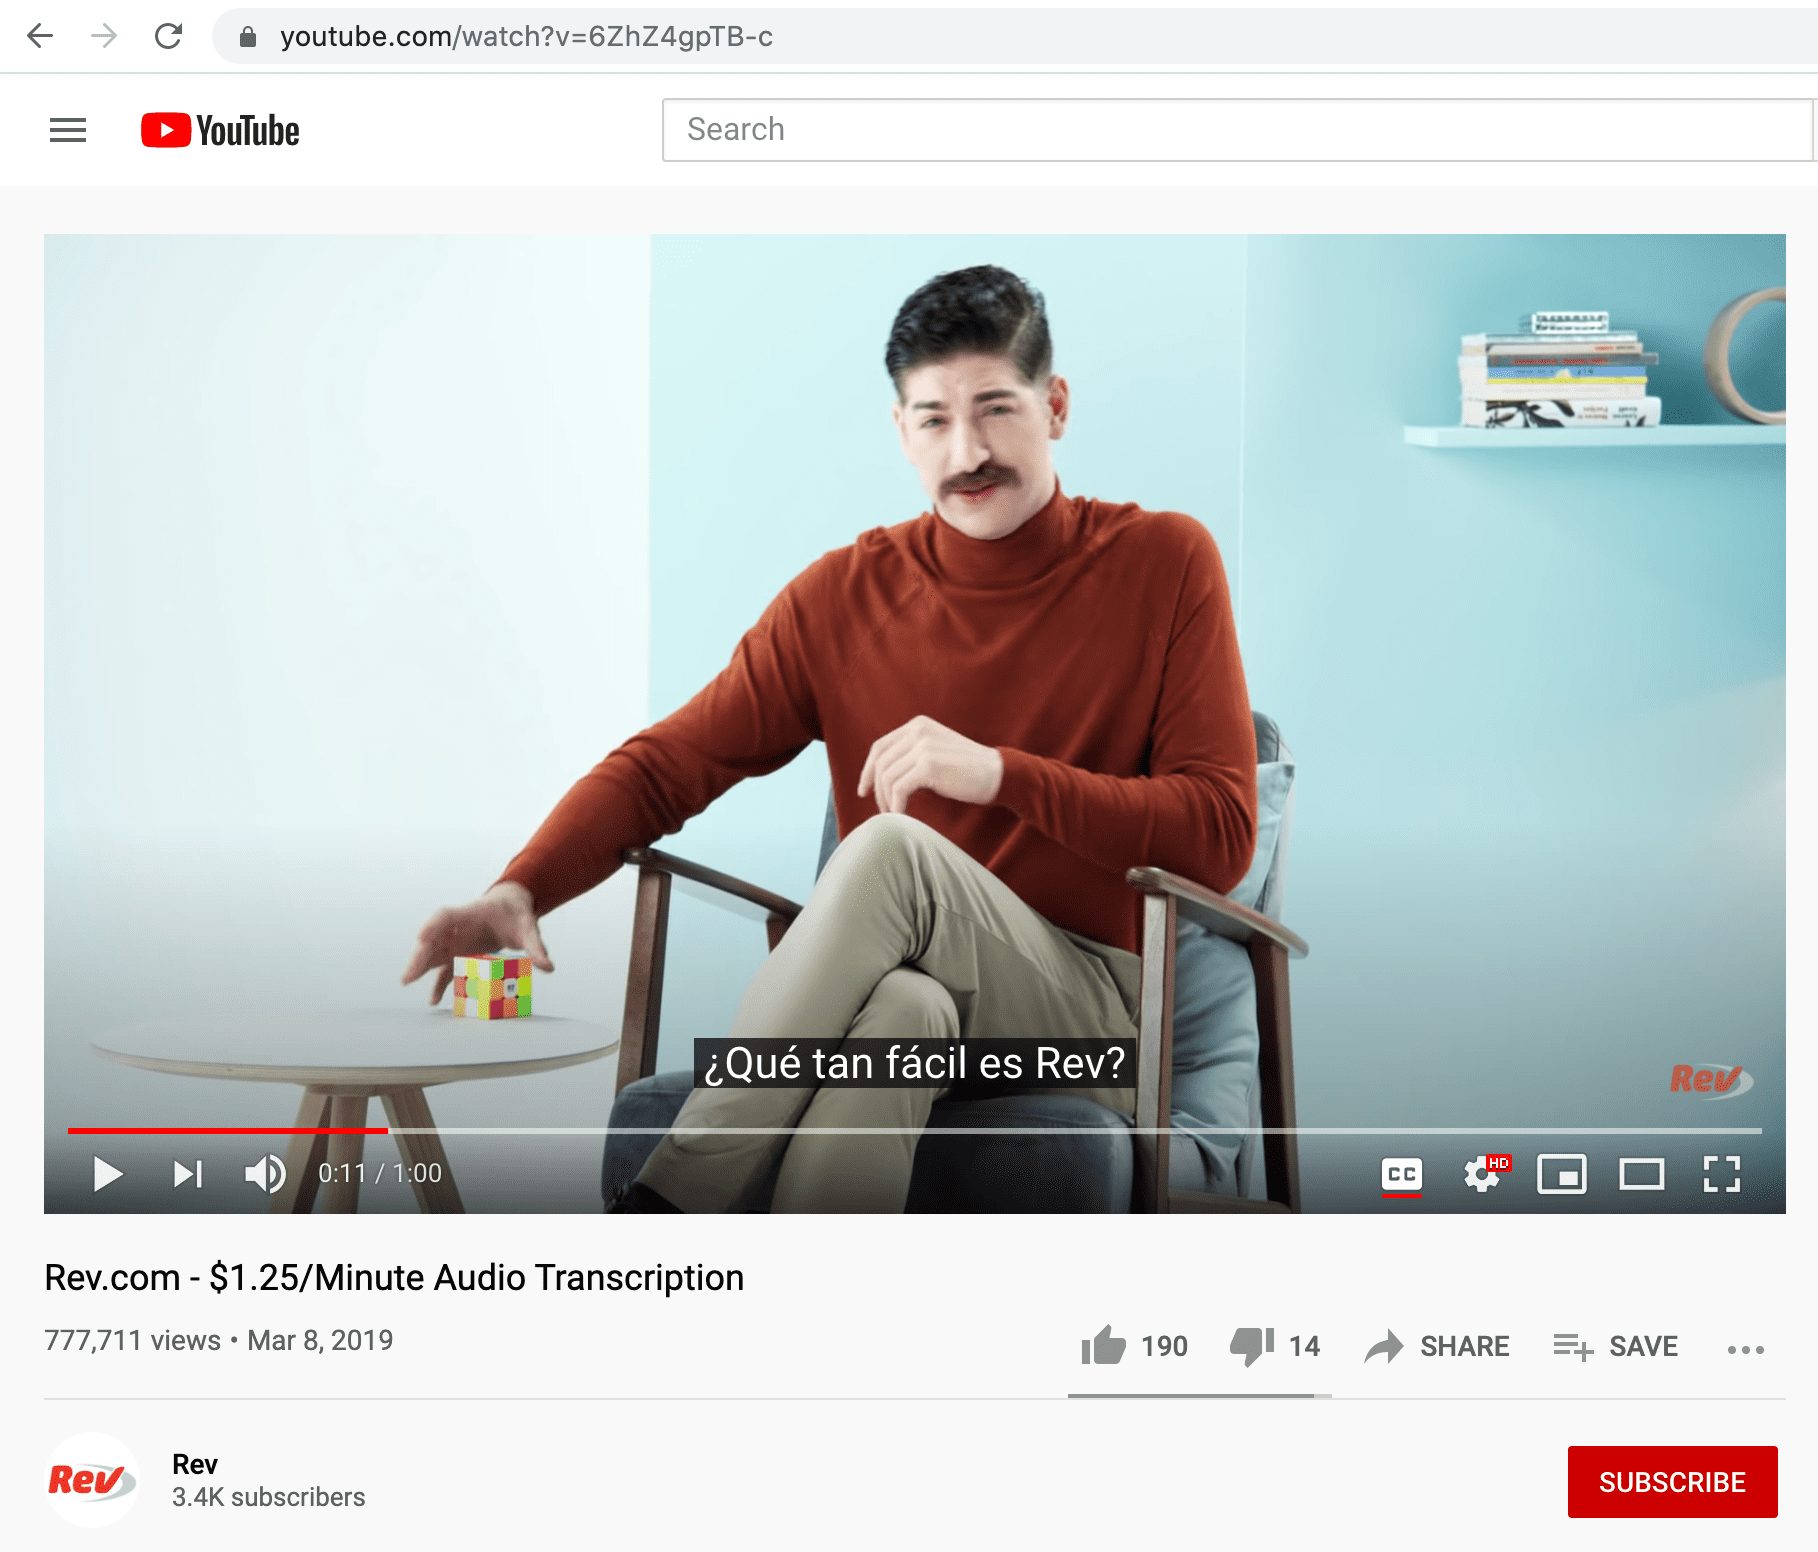
Step 2: Check To Make Sure the Video Has Captions/Subtitles Added
Not every video comes with captions and subtitles. That being said, the number of videos with this option is growing due to the popularity and usefulness of subtitles and captions.
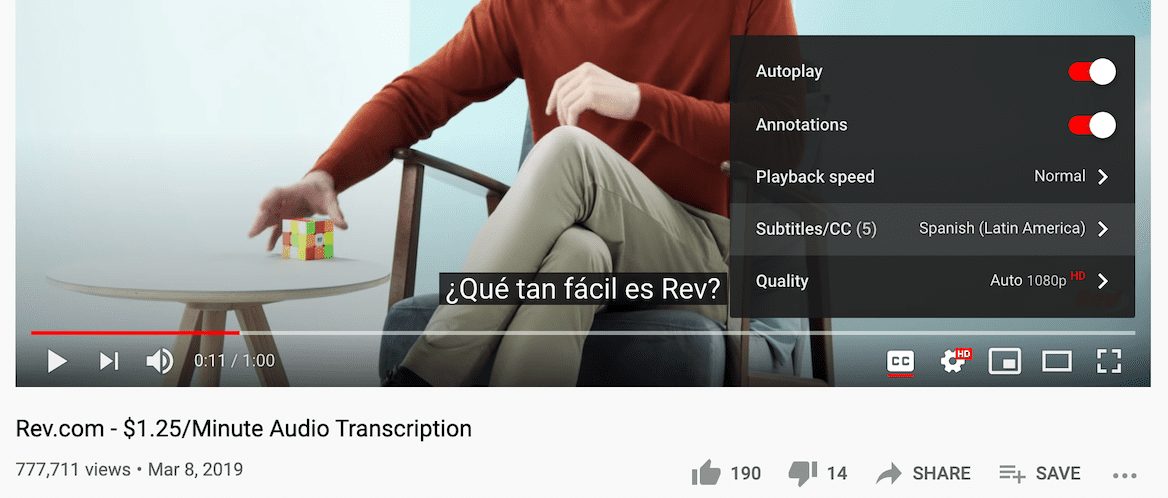
Step 3: See Which Subtitle Languages Are Available
To do this, click on “Settings” and “Subtitles/CC.” You may be surprised to see the various options on a video, and that some videos can have many subtitles choices to enjoy.
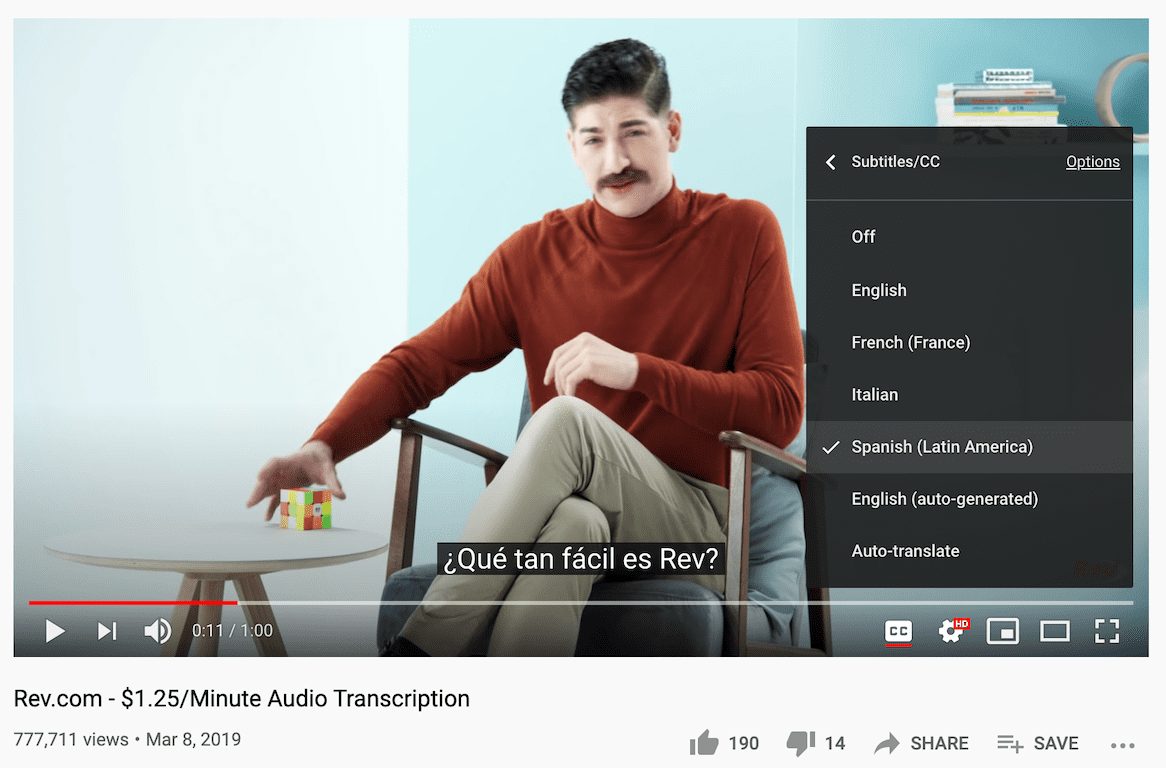
HOW TO GET YOUTUBE TRANSCRIPTS
Step 4: Open the YouTube Video Transcript
To do this, navigate to the menu below the video and click the three dots next to “Save”. From there, click “Open Transcript”.
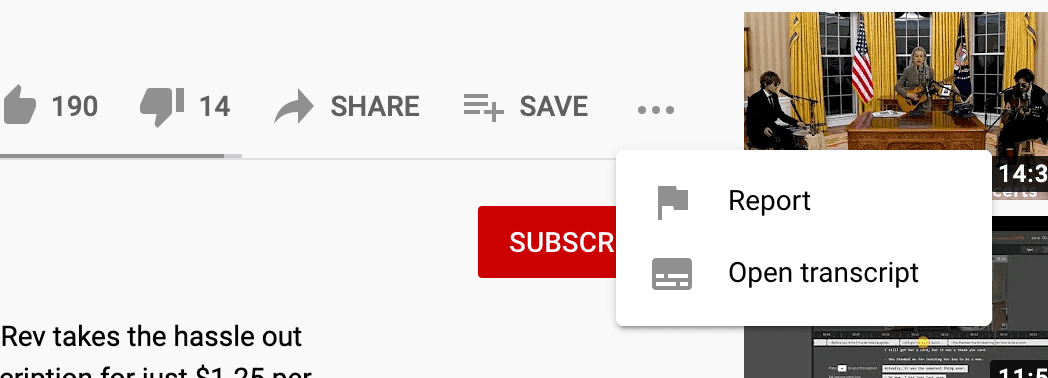
Step 5: An Interactive Transcript Will Appear
The interactive transcript will appear next to the video on the right side of the window. Note that this feature does not work on the YouTube mobile application.
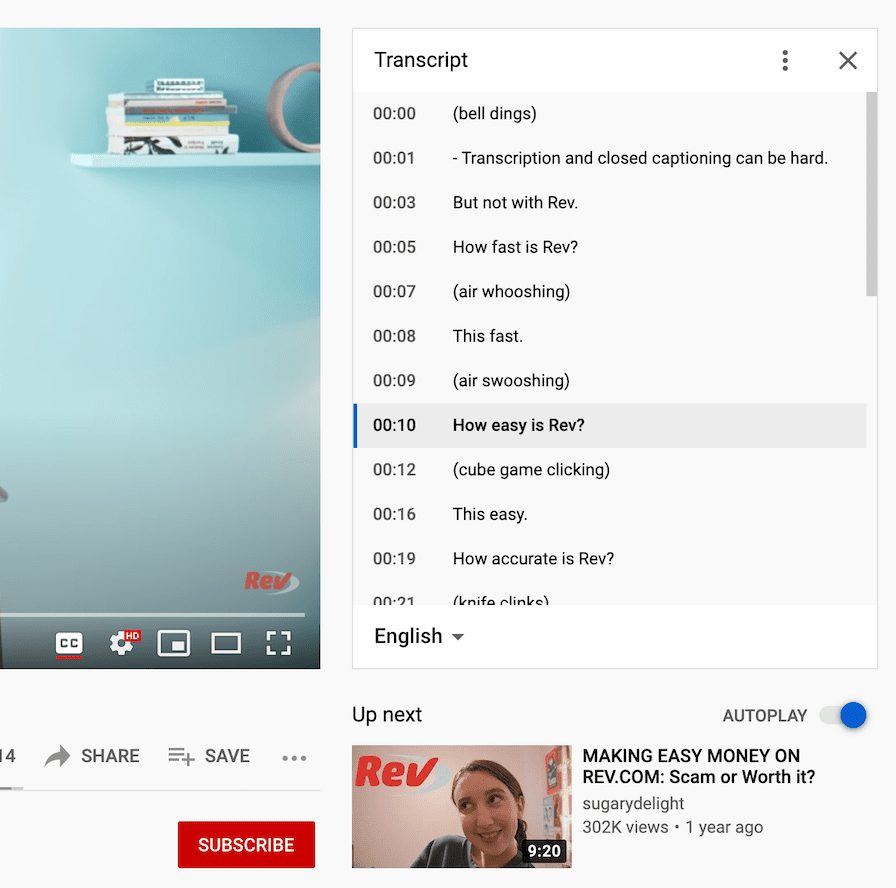
Step 6: Select Your Subtitle Language
Click the dropdown menu at the bottom of the transcript to select the language of your subtitles.
(NOTE: The video must already have these subtitles uploaded for them to appear on this menu.)
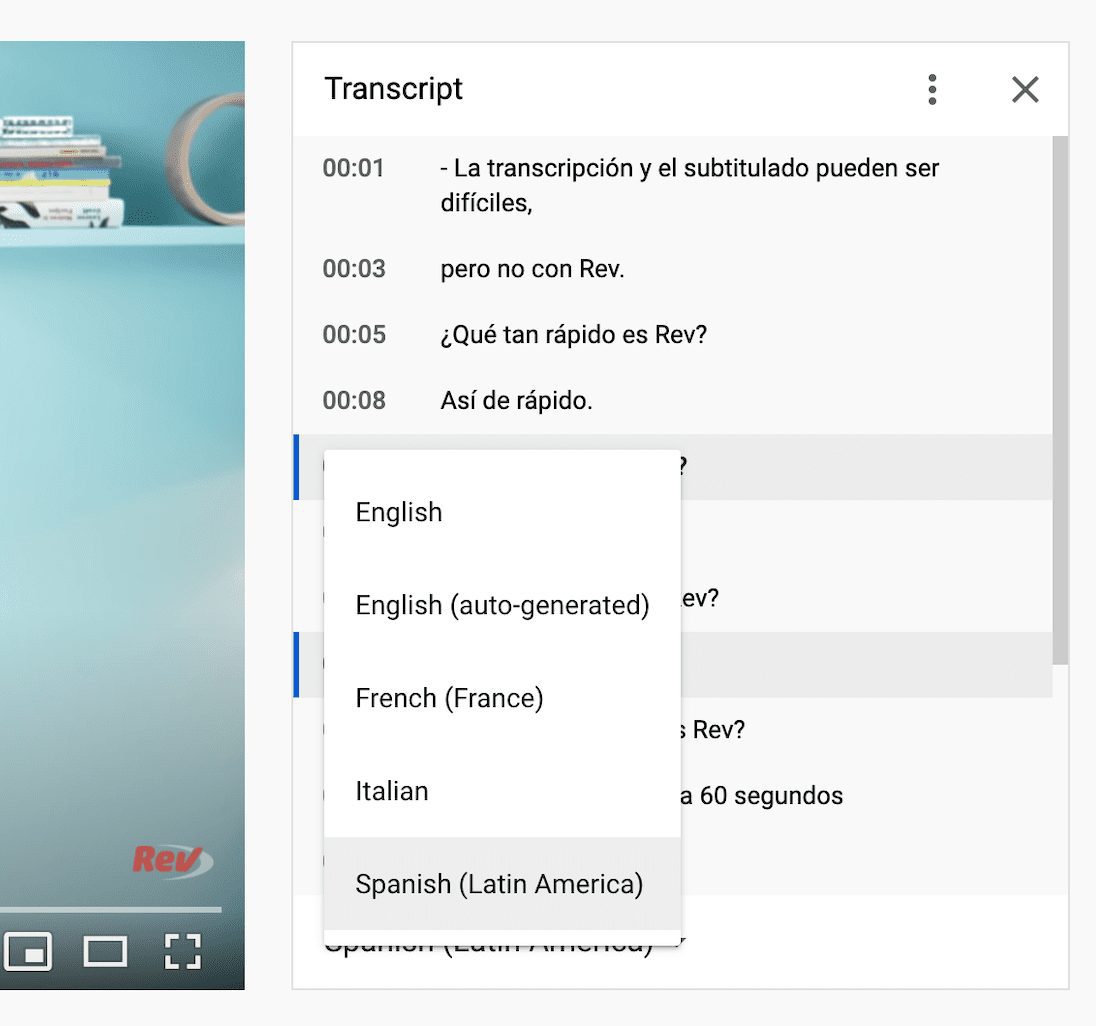
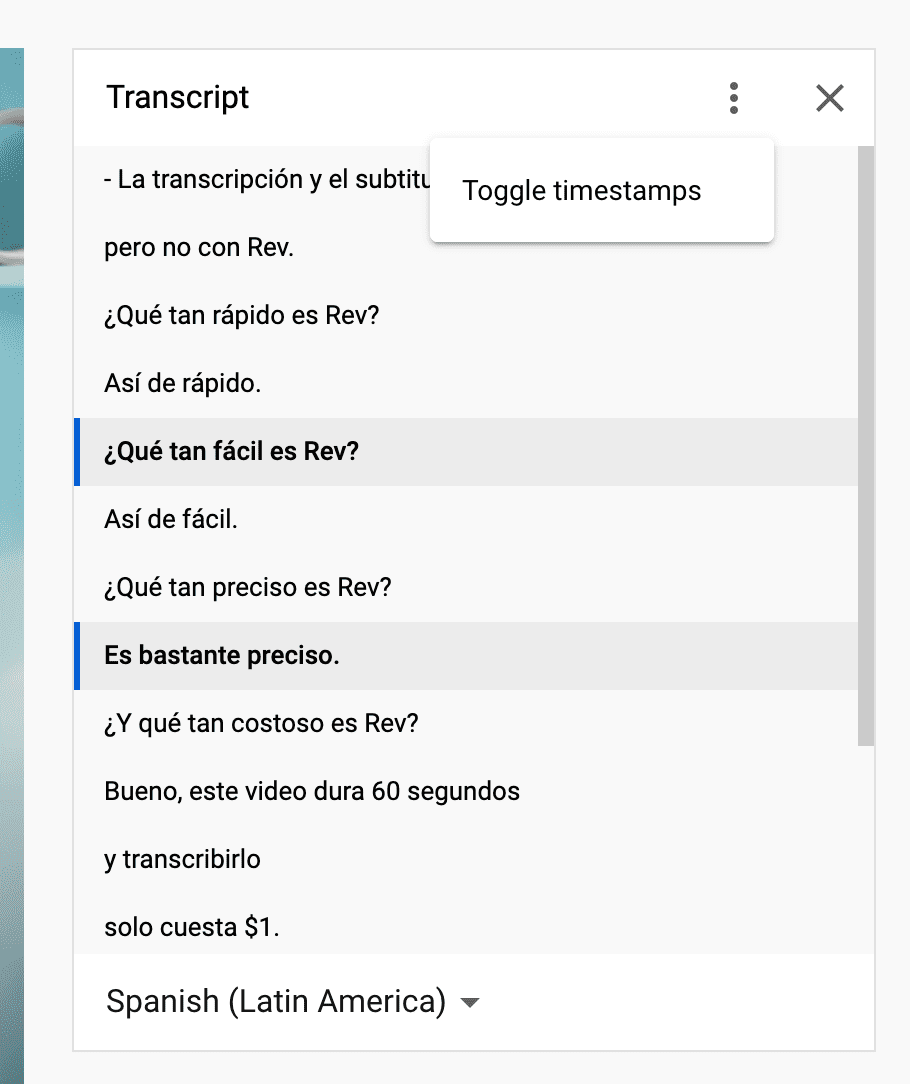
Step 7: Toggle the Transcript Timestamps
Click the three dots at the top of the transcript to turn the timestamps on or off. Timestamps are helpful when going back to the video to view the scene that matches a piece of text.
This way, you won’t have to watch through an entire video to find just the part you are looking for, and it’s easier to refer others to a specific point in the video and the matching text, too.
Step 8: Highlight the Transcript
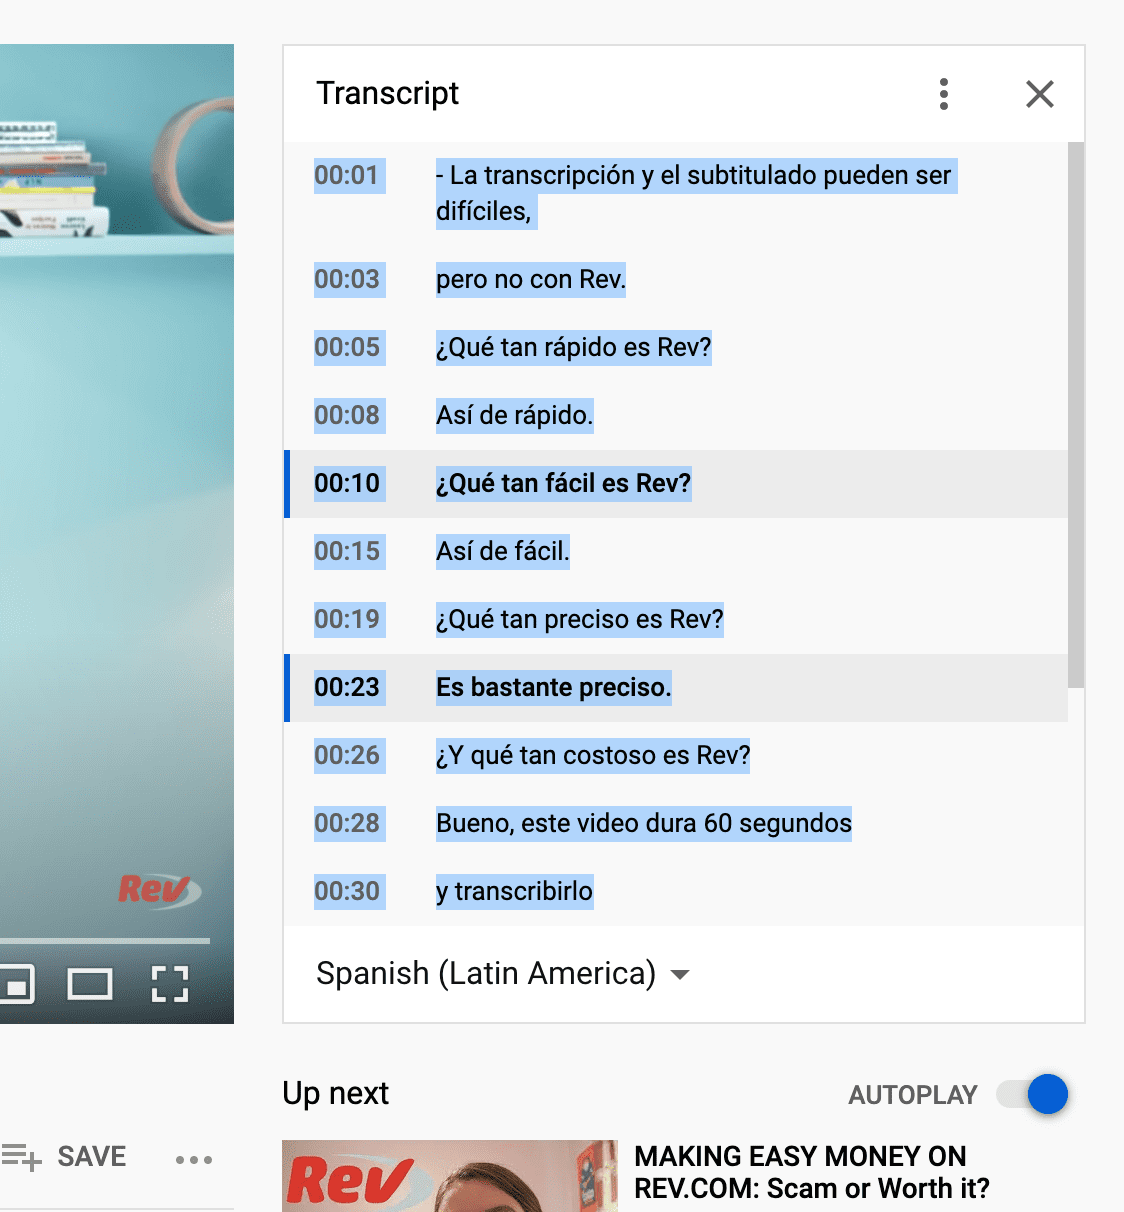
Start at the top, place your cursor before the first letter, and drag it down to the bottom of the transcript. If you’re using a PC, click Ctrl+C to copy it all.
Step 9: Paste Your Transcript
PC users can type Ctrl+V to paste the entire transcript into their document. If you need it to match the formatting of an existing document, right-click on the place in your document where you want the text to go, then choose the “Merge formatting” paste option, or use the Ctrl+Shift+V hotkey for certain programs.
Creating Subtitles for Your Own YouTube Videos
These steps will help you get fast subtitles for other creators’ work, but what happens if you want subtitles for something you made and uploaded to YouTube? Adding foreign language subtitles to your videos has numerous benefits, including:
- More accurate than YouTube’s automated transcripts
- Multiple options for languages
- Easy to create and upload
- Affordable
Using Rev’s subtitling services before you upload your video to YouTube is your best option, although you can certainly create the text after it’s been shared on the platform.
To get Rev’s subtitles tools up and running, simply go to the Rev global subtitles checkout page and choose the language(s) of your choice. Currently, there are over 15 languages, including Polish, Japanese, and Czech. If your video is in another language that you want to be subtitled in English, there’s an option for that, too.
For videos that are already created and uploaded, you can get an accurate transcript by using Rev’s Human or AI Transcription services. Both offer unmatched accuracy, low costs, and lightning fast turnaround times. Pick the option that fits your budget and timeline.
If the YouTube video is public, you can simply paste the URL to the video on the Rev checkout page. There’s no need to upload the video itself. Rev’s teams will get to work transcribing the audio from the YouTube video and notify when the text file is done. You can then use this file for your own uses, or (if you own the video) upload the transcript to the video page for a more accurate account than what the YouTube automated text generates.
And there you have it! Pretty easy, right?
How To Access YouTube’s Automatically Generated Captions
YouTube uses an algorithm to guess what’s being said in each video. Here’s how to access this:
- Log in to your YouTube Studio.
- Using the left menu, choose Subtitles.
- Choose the video you want captions for.
- Review what YouTube’s algorithm did and rewrite it to make it more accurate.
YouTube uses speech recognition technology that approximates what’s being said. Even though YouTube’s algorithm gets some words right, it often makes mistakes. Also, if you want to have captions for sounds or sound effects that are important to the video, the algorithm won’t transcribe these.
Putting Scripts in the Video Description
You could also put a script in the video description by simply editing it and typing in the words of the video. However, this is difficult, or impossible, for viewers to read as they watch the video. Their eyes have to leave the screen to read the content, causing them to miss much of the video.
How to Upload YouTube Captions
To upload transcript to YouTube, you have to:
- Log onto your YouTube channel and go to your channel homepage.
- Click Manage Videos towards the top.
- Select the video you want to add the captions to and select Subtitles
- Choose the language you want and click Add.
- Click Upload file, then Choose either With timing or Without timing, then Continue.
- Select your transcript/caption file from your computer (you can order one from Rev here), and click Open.
You can then see your captions on the left side of the screen. Need to take a step back and learn how to upload your video to YouTube first? We’ve got you covered.
The Benefit of Timecode Files
With a timecoded caption file, you can eliminate the chance of the words not matching up with the corresponding speech or images in the video. YouTube can read the timecode of each portion of text. It then correlates that timecode with the ones it automatically generates for each video. YouTube uses this information to align your text with the appropriate time they’re supposed to appear.
To save valuable time, many users choose to use a service like Rev for their captions and subtitles. You can be provided with a timecoded transcription that YouTube can read in order to properly align it with your video. This way, the words in the captioned files appear on the screen in sync with the video, automatically, without you having to do any editing.
You can also choose to have important sounds transcribed. For example, if you have a piano piece by Debussy playing in the background, a caption with the text “Debussy’s Clair de Lune” can appear on the screen, helping to set the mood for the scene.
Learn more about the benefits of captioning on our blog.


Subscribe to The Rev Blog
Sign up to get Rev content delivered straight to your inbox.